
What Is Google Tag Manager?
Google Tag Manager (GTM) is a powerful tool designed to help you manage and deploy marketing tags—such as code snippets or tracking pixels—on your website or mobile app without needing to modify the underlying code. This streamlines the process of adding and updating tags, allowing marketers to efficiently track user behavior and assess the impact of their campaigns.

what-is-gtm
GTM enables you to monitor a variety of activities on your website, including user interactions like page views, clicks, form submissions, and more. By utilizing GTM, you can collect crucial data to refine your marketing strategies and enhance the user experience. Essentially, GTM allows you to track almost any action that users take on your site.
Components of Google Tag Manager
Before diving into how GTM operates, it’s important to understand its core components and their interactions. GTM is built around several key elements: tags, triggers, variables, and data layers. These components work together to provide efficient and flexible tracking of various metrics.
Tags
Tags are snippets of code that perform specific actions on your website or mobile app. They help track user behaviors such as page views or clicks, allowing for a better understanding of user interactions. Most tags are used to collect measurement data from your site and send it to analytics tools like Google Analytics.
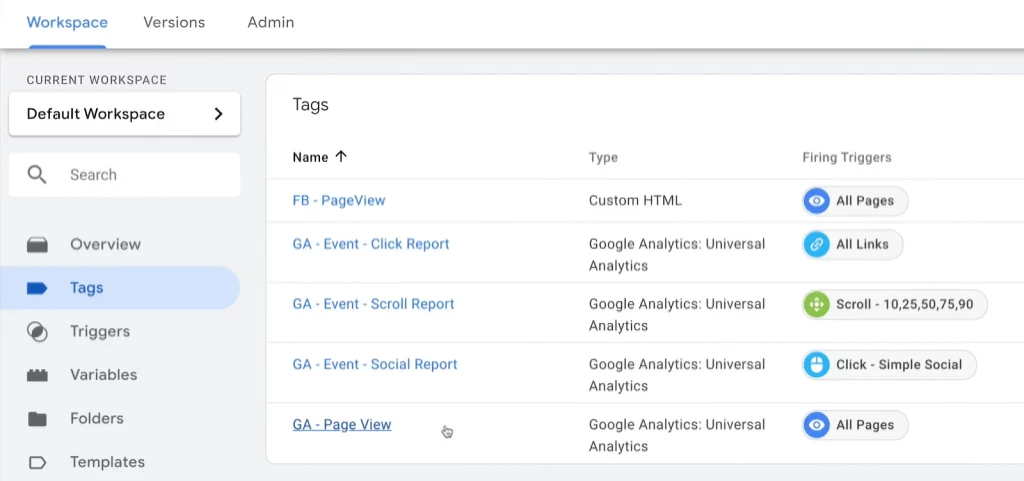
GTM-tags-examples
Triggers
Triggers specify the conditions under which your tags should activate. They determine when and where your tags should fire by listening for specific events such as clicks, form submissions, or page loads. When an event matches the conditions set by a trigger, the associated tags are executed.
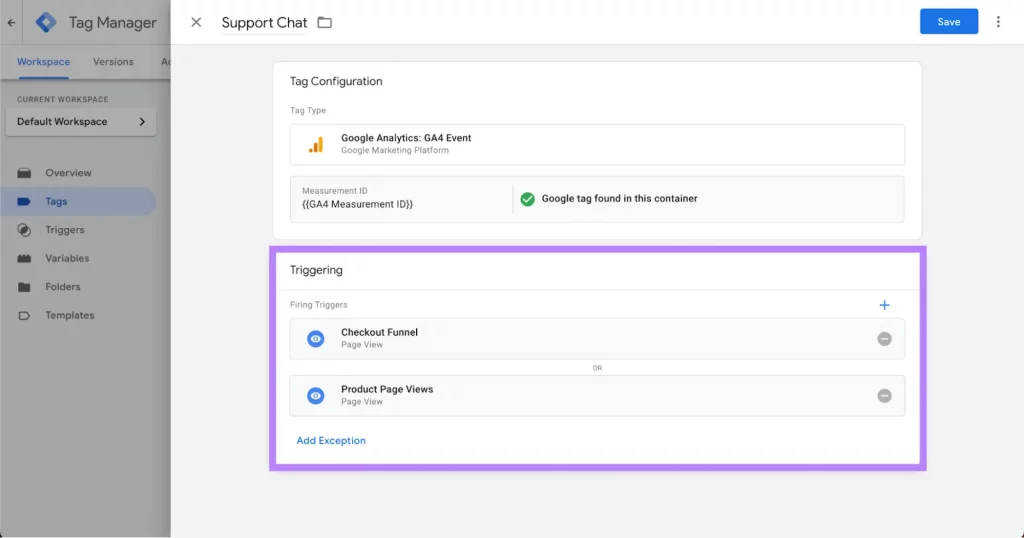
Google-Tag-Manager-Triggers
In other words, triggers act as the “rules” for when your instructions should be executed. For example, you might create a trigger that says, “record a page view only when someone visits the ‘Thank You’ page after making a purchase.”
Variables
Variables store and manage the information that tags and triggers need to function, such as product names, price values, or dates. For example, a variable might hold the URL of the current page. Variables can be built-in (predefined by GTM) or custom (created by you).
Data Layer
The data layer in GTM serves as a temporary storage area for values that tags, triggers, and variables need. It is a JavaScript object that acts as a bridge, collecting and passing information to GTM. For instance, it might capture details about a customer’s purchase and send this data to GTM for tracking purposes.

Google-Tag-Manager-scheme
How Does Google Tag Manager Work?
Google Tag Manager simplifies tag management by using a single container code that you place on your website. This container enables you to add, edit, and manage multiple tags through the GTM interface without modifying the website code directly.
Here’s how it works:
Tag Management: Once the GTM container code is installed on your site, you can manage tags from the GTM interface. This eliminates the need to manually update your site’s code for each new tag.
Event Detection: GTM uses built-in listeners to detect user interactions, such as clicks or page views. It then checks if these interactions match predefined triggers.
Tag Activation: When a user interaction matches a trigger, GTM activates the corresponding tag. This tag injects the necessary code into the site, sending data to third-party services like Google Analytics or Facebook Pixel.
Reduced Code Clutter: This method reduces website code clutter and minimizes the risk of implementation errors, as you manage all tags through GTM instead of updating the site’s code directly.
Tags rely on other GTM components—triggers and variables—which define when and how the code snippets should be executed.
How to Set Up Google Tag Manager
Setting up Google Tag Manager (GTM) may seem challenging for beginners, but it’s actually a straightforward process with the right guidance. Here’s a detailed step-by-step guide:
Step 1: Create a Google Tag Manager Account
- Go to the Google Tag Manager website.
- Click on “Create account,” then enter your account name and select your country.
- Optionally, check the box to “Share data anonymously with Google and others.”
Step 2: Set Up a Container
- Enter a name for your container (e.g., your website name).
- Choose where the container will be used (Web, iOS, Android, or AMP).
- Review and agree to the GTM Terms of Service.
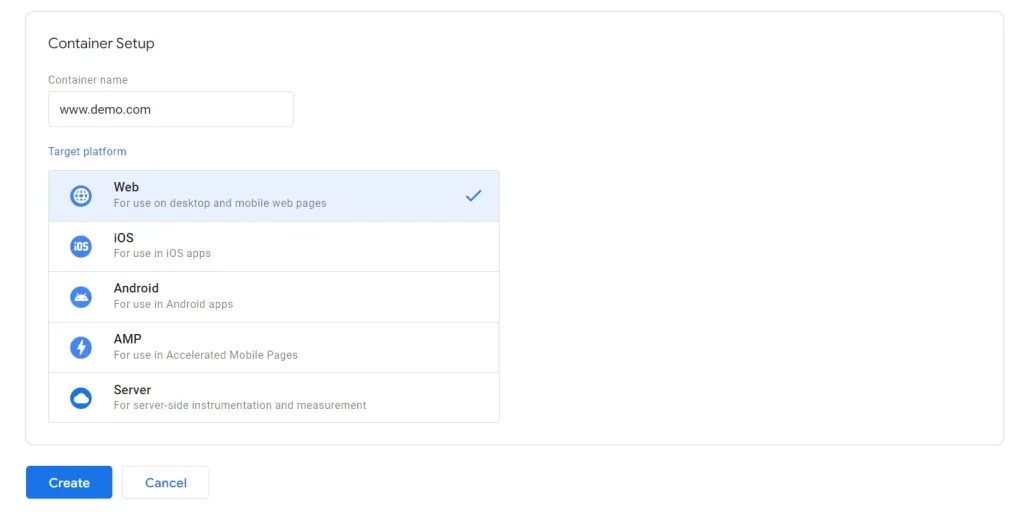
Step 3: Add GTM Code to Your Website/App
- After creating the container, you’ll receive two snippets of code.
- Copy the first snippet and paste it as high as possible within the
<head>section of your website. - Copy the second snippet and paste it into the
<body>section, immediately after the opening<body>tag. - To test, enter your website’s URL and click “Test.”
- Save and publish your changes.
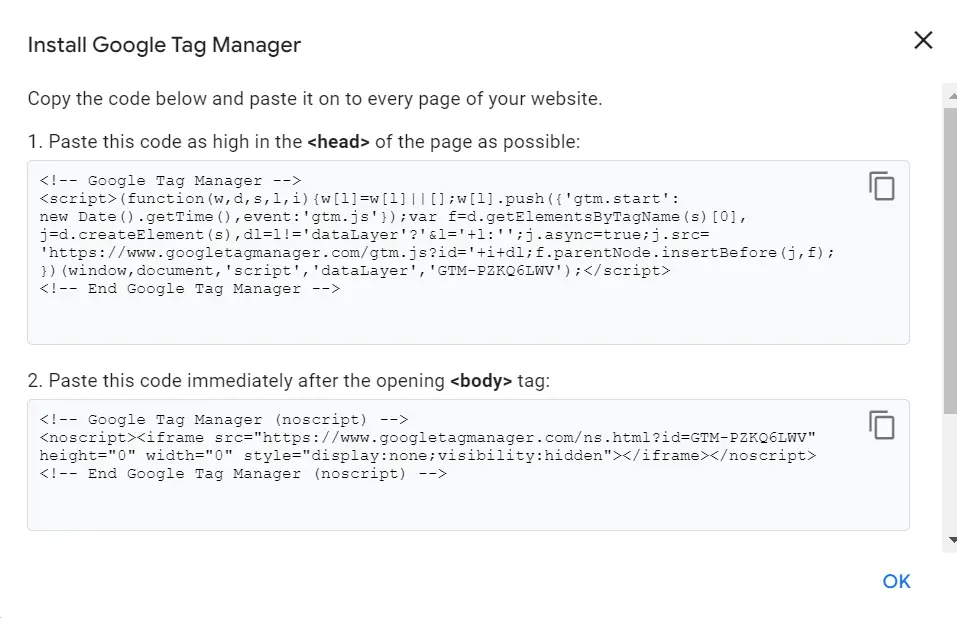
Step 4: Configure Your First Tag
- In GTM, click “New Tag,” then select “Tag Configuration” and choose the type of tag you want to create.
- Enter the necessary details for your tag.
- Click “Triggering” to define the conditions that will activate the tag.
- Save your tag by clicking “Save.”
Step 5: Publish Your Container
- Once your tags are configured, click “Submit” in the top right corner.
- Provide a Version Name and Description to document your changes.
- Click “Publish” to apply and make your changes live.
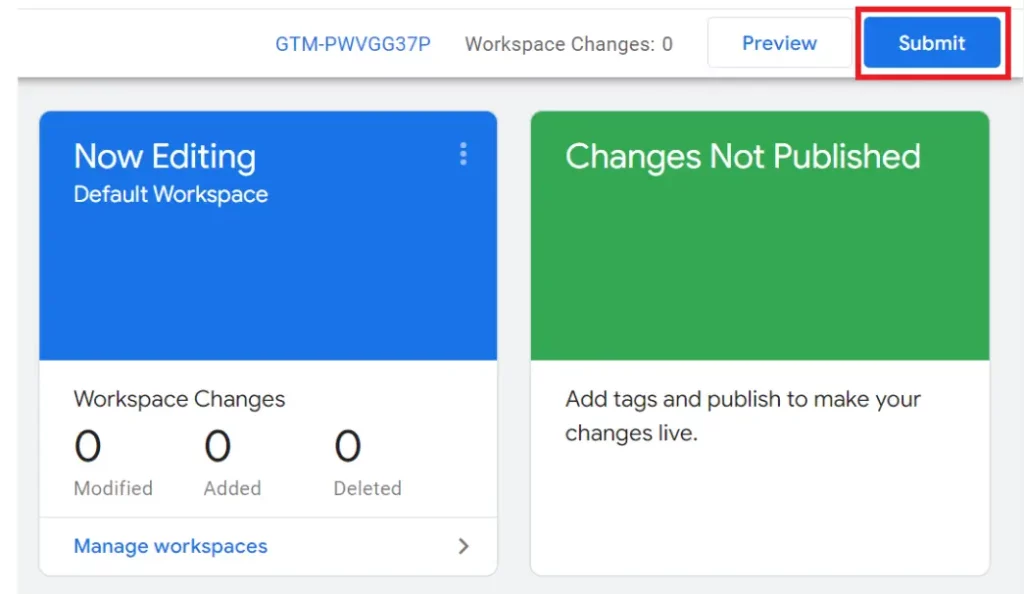
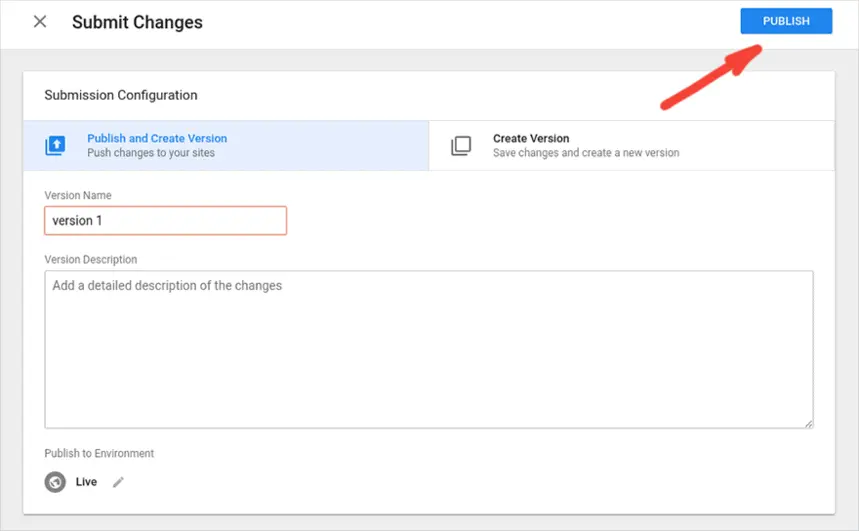
By following these steps, you’ll effectively set up Google Tag Manager and start optimizing your tag management, enhancing your website’s tracking and analytics capabilities.
How to Use Google Tag Manager
If you’re new to Google Tag Manager, here’s a step-by-step guide to help you connect a Google Analytics 4 (GA4) property to your site:
- Log In: Access your Google Tag Manager account.
- Create a New Tag: Click on “New Tag” or “Add a new tag.”
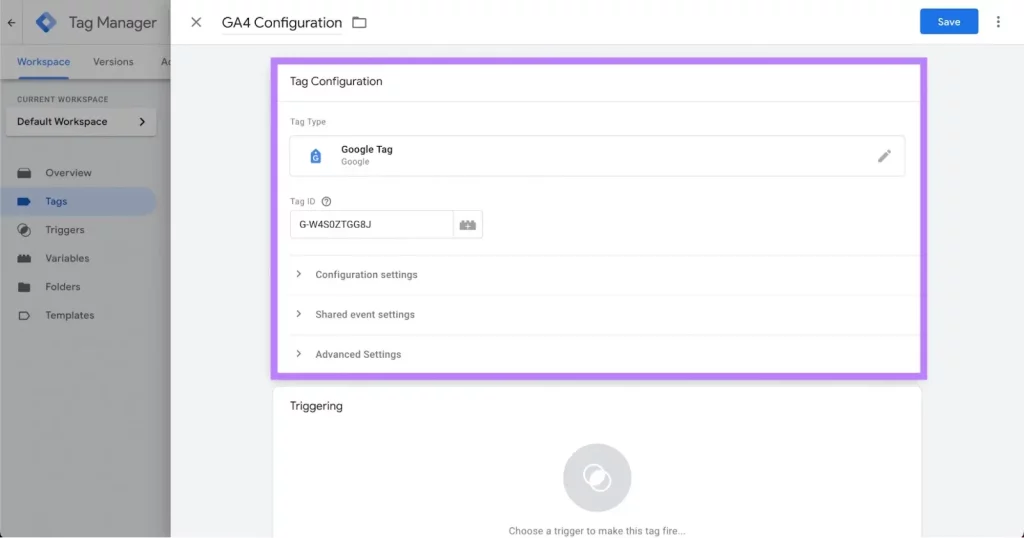
- Name Your Tag: Enter a name for your tag, such as “GA4 Configuration.”
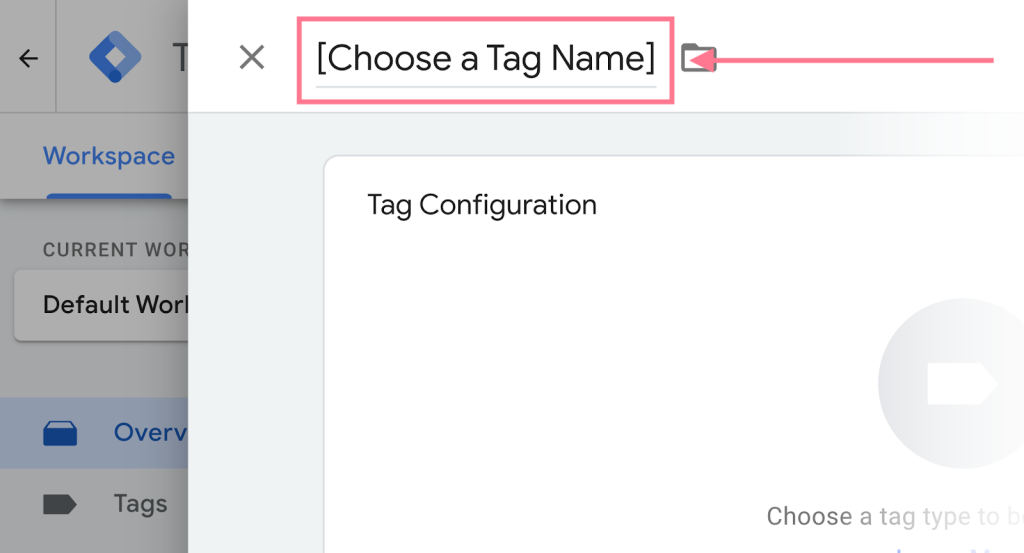
Click on “Tag Configuration,” choose “Google Analytics,” and select “Google Tag.”
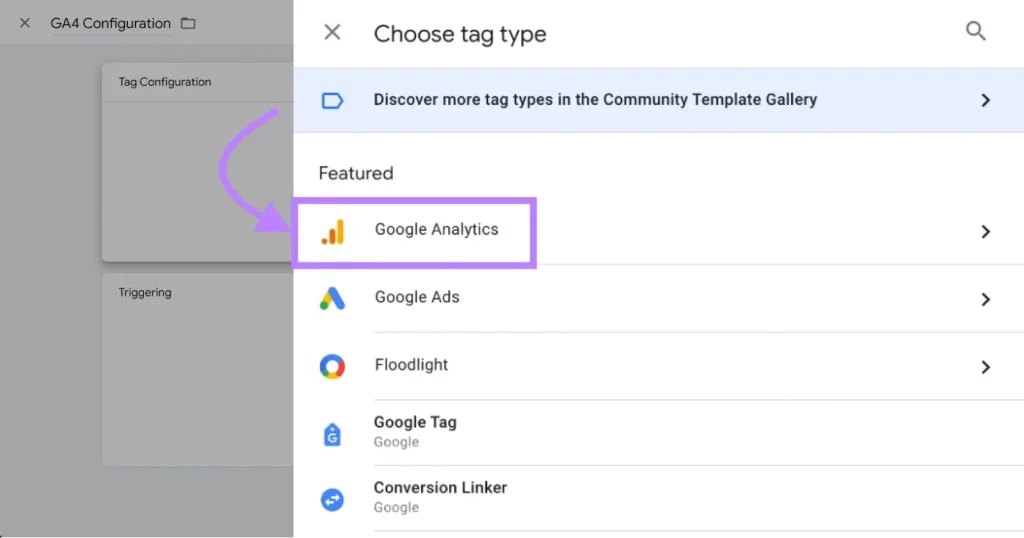
Enter the Google tag ID for your GA4 property, or create a variable to store your Google tag ID for future use.
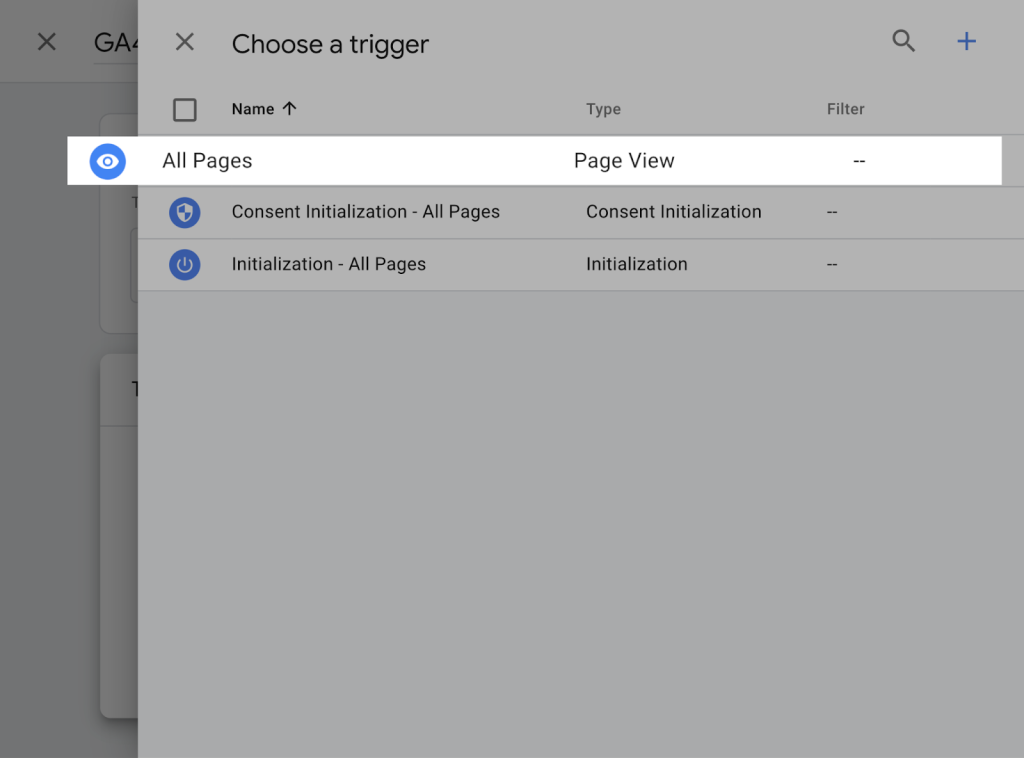
Click the “Triggering” section and choose “All pages.” Then, hit “Save.”
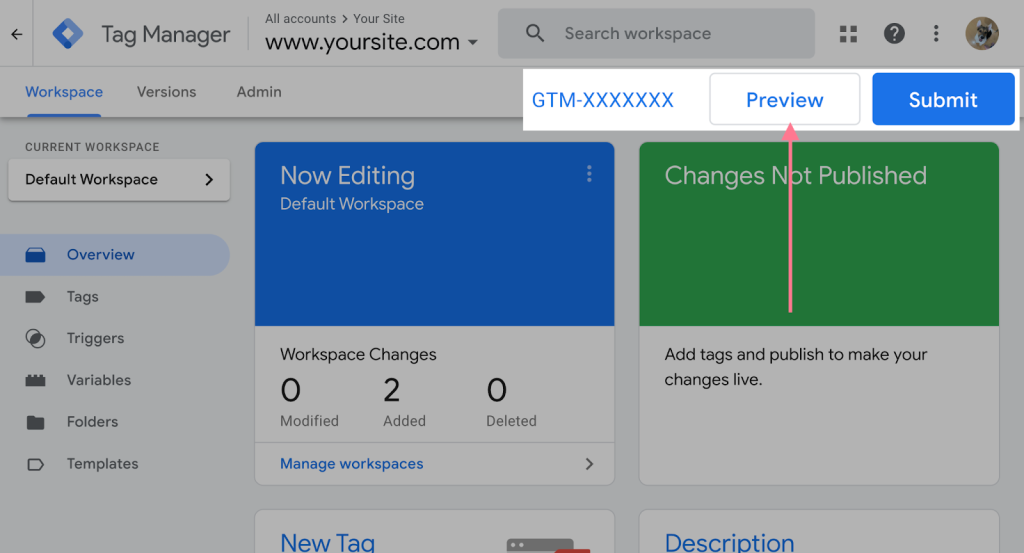
Now, return to the overview page and click “Preview” to test your new changes.
How to Check if Google Tag Manager is Working Properly
It’s important to ensure that Google Tag Manager (GTM) is functioning correctly to guarantee accurate tracking and data collection. Here are two effective methods to verify your GTM setup:
Use the Preview Mode: Activate GTM’s Preview Mode to test and debug your tags in real time. This mode allows you to see which tags are firing on your site and provides information about triggers and variables.
Check the Tag Assistant Extension: Install the Google Tag Assistant browser extension to monitor your tags and ensure they’re working as expected. The extension will help you identify any issues with your GTM setup and verify that data is being sent correctly.
Key Takeaway
Google Tag Manager streamlines the process of managing and deploying tags, making it an essential tool for marketers. By following this guide, you can effectively set up and optimize GTM for your website, ensuring precise data tracking and enhanced marketing performance. With proper setup and ongoing maintenance, GTM can significantly boost the effectiveness of your digital marketing campaigns.


